Measures use the rules from input data sets to perform summary calculations.
To create a measure:
-
On the top of the Measure Factory Editor page, click Measures.
-
On the upper right, click New.
The new
 measure is created with the default name NewMeasure# and opens in the detail pane on the right side of the screen.
 -
Enter a name for the measure, and then click the Check icon
 .
. -
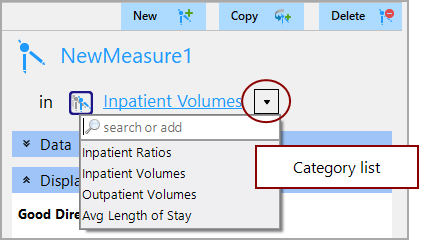
From the
category list, select a category for this measure.TIP: If you want to create a new category, enter a new name in the category search or add box.
-
If necessary, expand the Data section.
-
Select a scope from the Scope list.
-
Click the pencil icon to the right of the Calc option to open the expression editor, enter a calculation in the Expression box, and then click OK.
For more information about using the expression editor, see Calcs and Filters in the Editor.
-
If you want to add a filter, click the pencil icon to the right of the Filters option to open the expression editor, enter a filter expression in the Expression box, and then click OK.
-
In Workbench 7.1(20) and later, you can add an Auxiliary Measure by clicking the Add icon
 to the right of Auxiliary Measures, and then defining the auxiliary measure. For more information, see About Auxiliary Measures.
NOTE: In Workbench 7.1(19) and earlier, the Auxiliary Measures option is read-only in the Measure Factory Editor and must be defined in the script. See Measures Tags.
-
Click the Display double chevron to specify how the measure displays on dashboards.
-
Good Direction—Selects the direction considered favorable for the measure. Up is considered good direction by default.
-
Format—Selects or adds a new format to use when the measure displays.
-
Analyses—Defines the options for analyzing the measure in DivePort.
NOTE: In Workbench 7.1(19) and earlier, the Analyses option is read-only in the Measure Factory Editor and must be defined in the script. See Measures Tags.
-
-
In Workbench 7.1(20) and later, you can specify a Default Analysis by clicking the Add icon
to the right of Default Analysis and then defining the default analysis. For more information, see Adding a Default Analysis. -
In Workbench 7.1(20) and later, you can specify a Custom Analysis by clicking the Add icon
to the right of Custom Analyses and then defining the custom analysis. For more information, see Adding a Custom Analysis.In this
example, the measure Ending Inventory in the Inventory category, uses a calculation and filter, and defines the display format. -
Expand the
Documentation section to enter additional information about the measure if your organization requires it.When editing in the multi-line text boxes, press Ctrl+Enter or Shift+Enter to create a new line, or press Enter to apply your changes and exit edit mode.
- Optionally, expand the Governance section to enter notes regarding governance. For example, who is responsible for updates, or when it was last modified.When editing in the multi-line text boxes, press Ctrl+Enter or Shift+Enter to create a new line, or press Enter to apply your changes and exit edit mode.
- Save the file.


See also: