This procedure is for manually adding a time period to a time series. For full instructions for creating a time series, see Creating a Time Series.
-
Open a cBase or model that contains one or more time (date) dimensions.
-
Do one of the following:
-
On the toolbar, click the Time Series icon
 .
. -
On the menu bar, select Data > Time Series Control Panel.
The Time Series Control Panel opens.
-
-
To add a time series, click Add.
The Time Series General dialog box opens.
-
Select the options that you want, and click Next.
The Time Series Type dialog box opens.
-
In the Select Template box, select Blank.
-
In the Periods section, click Add.
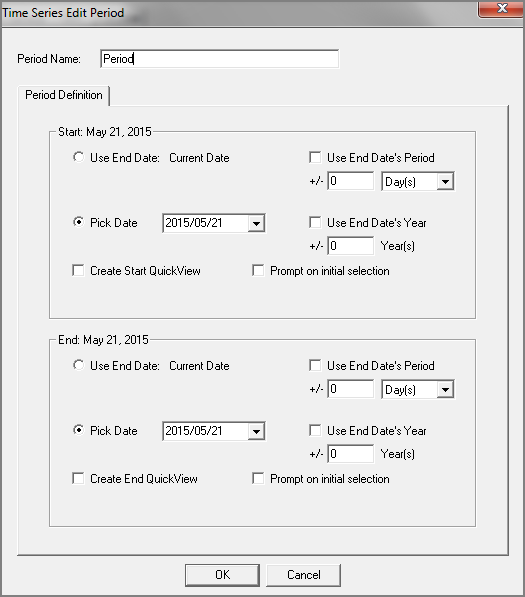
The Time Series Edit Period
 dialog box opens.
 -
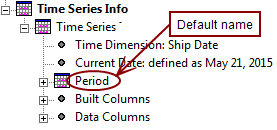
If you want the
ProDiver Console to display something other than the default label Period, enter a label Period Name. -
In the Start section, define a start date for the period.
- Use End Date: Current Date: Sets the period start date equal to the Current Date that is defined on the General tab.
- Pick Date: Sets the period start date as an offset of the Current Date that is defined on the General tab or a date that you select from an adjacent list. The dates listed are the values in the time dimension.
- Use End Date's Period: Available when Pick Date is selected. Select to set the period start date as an offset of the Current Date that is defined on the General tab. You specify the offset and the duration (Days, Months, Quarters, Halves) in the boxes below the check box.
- Use End Date's Year: Available when Pick Date is selected. Select to set the period start date as an offset of the Current Date that is defined on the General tab. You specify the offset in the box below the check box.
- Create Start QuickView: Creates a Start Date QuickView which you can use to select a start date from a list of values in the time dimension. You can select a Default Value that displays on the QuickView list.
- The Offset box to the right of the Default Value box does not affect the QuickView.
- Prompt on initial selection: Select this option if you want ProDiver to prompt you for a period start date to use for the time series when the DivePlan or marker opens.
-
In the End section, define an end date for the period.
These options are available
- Use End Date: Current Date: Sets the period end date equal to the Current Date that is defined on the General tab.
- Pick Date: Sets the period end date as an offset of the Current Date that is defined on the General tab or a date that you select from an adjacent list. The dates listed are the values in the time dimension.
- Use End Date's Period: Available when Pick Date is selected. Select to set the period end date as an offset of the Current Date that is defined on the General tab. You specify the offset and the duration (Days, Months, Quarters, Halves) in the boxes below the check box.
- Use End Date's Year: Available when Pick Date is selected. Select to set the period end date as an offset of the Current Date that is defined on the General tab. You specify the offset in the box below the check box.
- Create End QuickView: Creates an End Date QuickView which you can use to select an end date from a list of values in the time dimension. You can select a Default Value that displays in the QuickView list.
-
The Offset box to the right of the Default Value box does not affect the QuickView.
NOTE: There are two ways to define the end of a date range via QuickView:
- Create a Current Date QuickView, and then define the end of the date range based on this Current Date. You can also define the current date as having an offset. For example, if you know that the today's data in a cBase is incomplete, you can define the current date as the system date minus a day.
- You can define a group with its own start and end, and ignore the current date. If it is defined relative to the current date, the date range can have an offset from that.
- Prompt on initial selection: Select this option if you want ProDiver to prompt you for a period end date to use for the time series when the DivePlan or marker opens.
-
Click OK.
The Time Series Edit Period dialog box closes.
-
Continue with the Time Series Control Panel wizard. See Creating a Time Series.