NetDiver Data
To perform a dive:
-
On the Console, expand
-
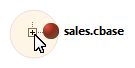
If necessary, expand the cBase
The Console displays a list of categories (optional) and dimensions. A down-arrow to the left of a dimension name indicates that the dimension is diveable.

-
Click the dimension that you want to dive on (this is the initial dive).
Dimension details appear in the dive window. This example shows a dive on the Supplier dimension. This is reflected in the Console History and the column heading in the dive window.

-
To perform the next-level dive, select an item in the dive window by clicking on it.
In this example,

-
In the Console, click a diveable dimension.
Dimension details specific to the item clicked in the previous step appear in a new dive window. This example shows a dive on the Product dimension. Note that the data on this dive is specific to the previous dive
The Totals row reflects the numbers for the specified

- Repeat steps 4 and 5 as needed.
NOTE: Each time that you dive on a dimension, a new dive window layer is added to the display. This dive window is a filtered view of the data based on the previous dives. Because it is the most recent or complete subset of data, it is considered to be the active dive window.
Watch the Video: How to Dive.
See also: