Adding a Tooltip and Hotspot
You can add custom tooltips to your pages using the hotspots feature of the image portlet.
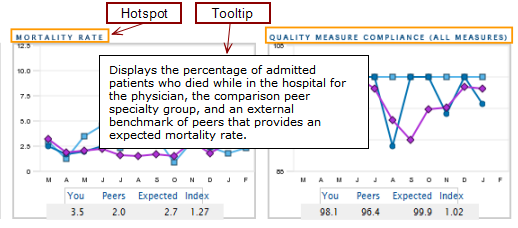
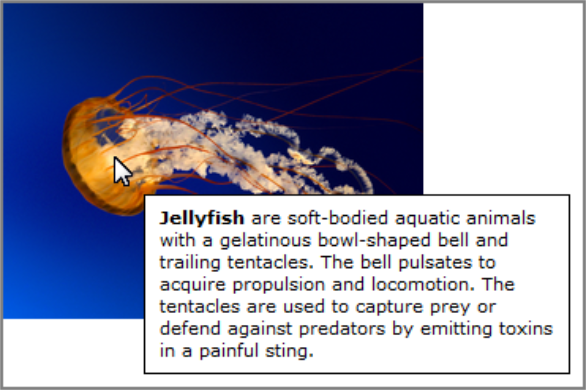
If the tooltip relates directly to information on part of an image, you have the option to edit the image to highlight the areas of interest before adding it to DivePort. The following example shows several areas of information. The two areas with orange borders indicate the existence of tooltips.
To add a tooltip to an image portlet:
-
In DivePort, browse to the page that contains the portlet that you want to edit or add.
-
On the toolbar, click Edit to unlock the page and enter edit mode.
-
Do one of the following:
- To edit an existing image portlet, double-click the portlet.
- To create a new image portlet, click the Edit the page contents chevron, and then click Add a portlet > Image Portlet > OK.
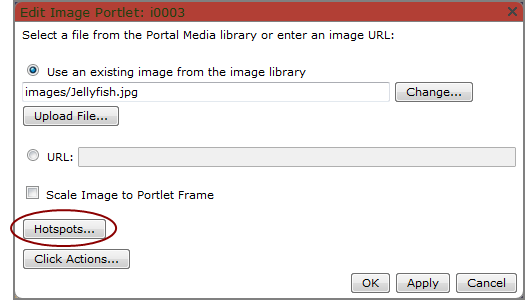
The Edit Image Portlet
 dialog box opens.
 -
Click Hotspots.
-
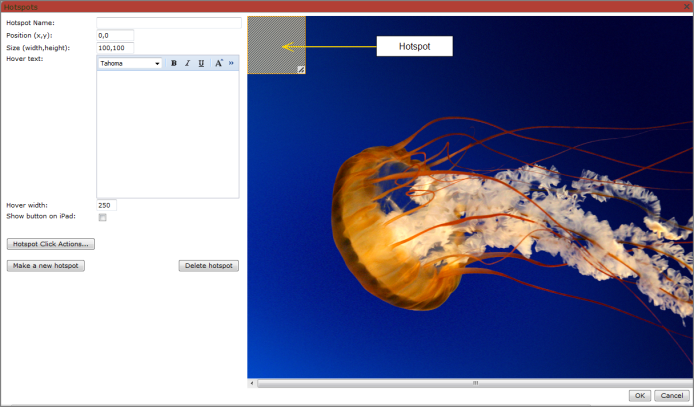
The Hotspots
dialog box opens with the image displaying in the main section, and options displaying in the left pane. -
Click Make a new hotspot.
The Hotspots
dialog box expands. A square appears in the upper right corner of the image. This is the hotspot.
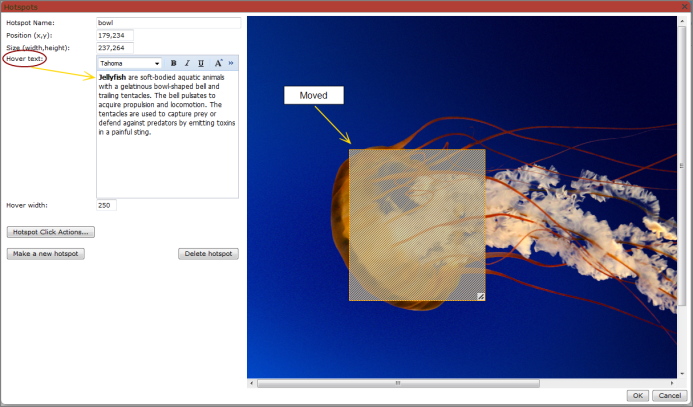
- Set the size and position of the hotspot one of two ways:
- Use a click-and-drag operation to reposition the hotspot and use the resize icon
 to change the width/height ratio.
 - On the dialog box, set the hotspot position relative to the top left corner of the image Position (x,y), and the hotspot size Size (width, height) in pixels.
- Use a click-and-drag operation to reposition the hotspot and use the resize icon
- Optionally, enter a name in the Hotspot Name box.
-
Enter the tooltip text in the Hover text
box; you can use the edit tools to change the font and style. - Optionally, in the Hover width box, change the width of the tooltip box in pixels.
- To add another tooltip, repeat steps 5 through 9. An image can have multiple tooltips.
- Click OK to close the Hotspots dialog box and save the tooltip.
- Click OK to close the Edit Image Portlet dialog box.
- On the toolbar, click Save to exit edit mode and lock the page.

Place the pointer over the part of the image covered by the tooltip. After one second, the tooltip appears.
See also Image Portlet Options.