Adding a CrossLink Click Action
Before you add a CrossLink click action, both portlets that you are linking must be created on the page. The link is established as a portlet instance setting on the target portlet, and you must know the portlet ID of the portlet that you are linking to.
- Browse to the page that contains the portlets that you want to link together.
- On the DivePort toolbar, click Edit to unlock the page and enter edit mode.
- Right-click the portlet to which you want to add the click action, and on the context menu, select Settings.
-
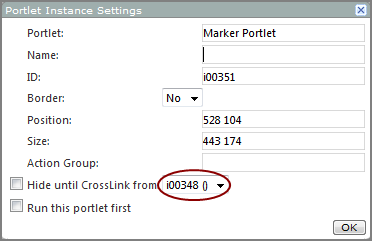
On the Portlet Instance Settings
 dialog box, make a note of the ID, and then click OK.
 - Right-click the portlet to which you want to link, and on the context menu, select Settings.
-
In the box to the right of Hide until CrossLink from, select the
ID from step 4. - If you want the target portlet to appear only as a result of the click action, select the Hide until CrossLink from check box.
- Click OK.

Next, add a CrossLink click action to a portlet:
- Browse to the page that contains the portlet to which you want to add a click action.
- On the DivePort toolbar, click Edit to unlock the page and enable edit mode.
-
Right-click the portlet that you want to edit, and then on the context menu, click Edit.
The Edit <Specific> Portlet page opens.
-
On the bottom of the page, click Click Actions.
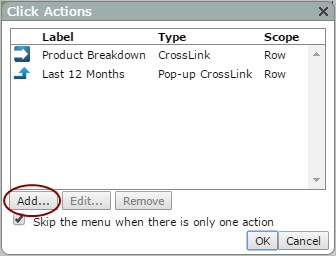
The Click Actions
dialog box opens, displaying a list of existing click actions. -
Click Add.
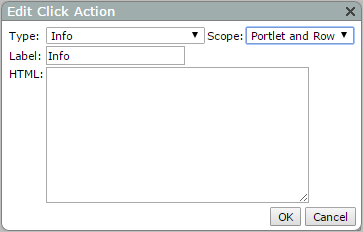
The Edit Click Action
dialog box opens. -
In the Type box, select CrossLink.
The Edit Click Action
dialog box opens.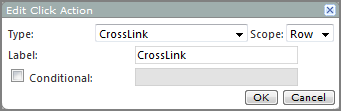
-
If you want something other than CrossLink, to appear in the click action context menu, add a name in the Label box.
-
If you want to specify a condition that must be met before the click action is available, select the Conditional check box, and define the necessary condition.
-
Click OK to close the Edit Click Action dialog box.
The new CrossLink click action is added to the Click Actions list.
- If this is the only click action on the list, and you want the target page to display immediately when the click action is triggered, select Skip the menu when there is only one action.
- Click OK to close the Click Actions dialog box.
- Click OK to close the Edit Portlet dialog box.
- On the toolbar, click Save to exit edit mode and lock the page.
See also: