On dive pages, users can switch dimensions and dive on dimension values
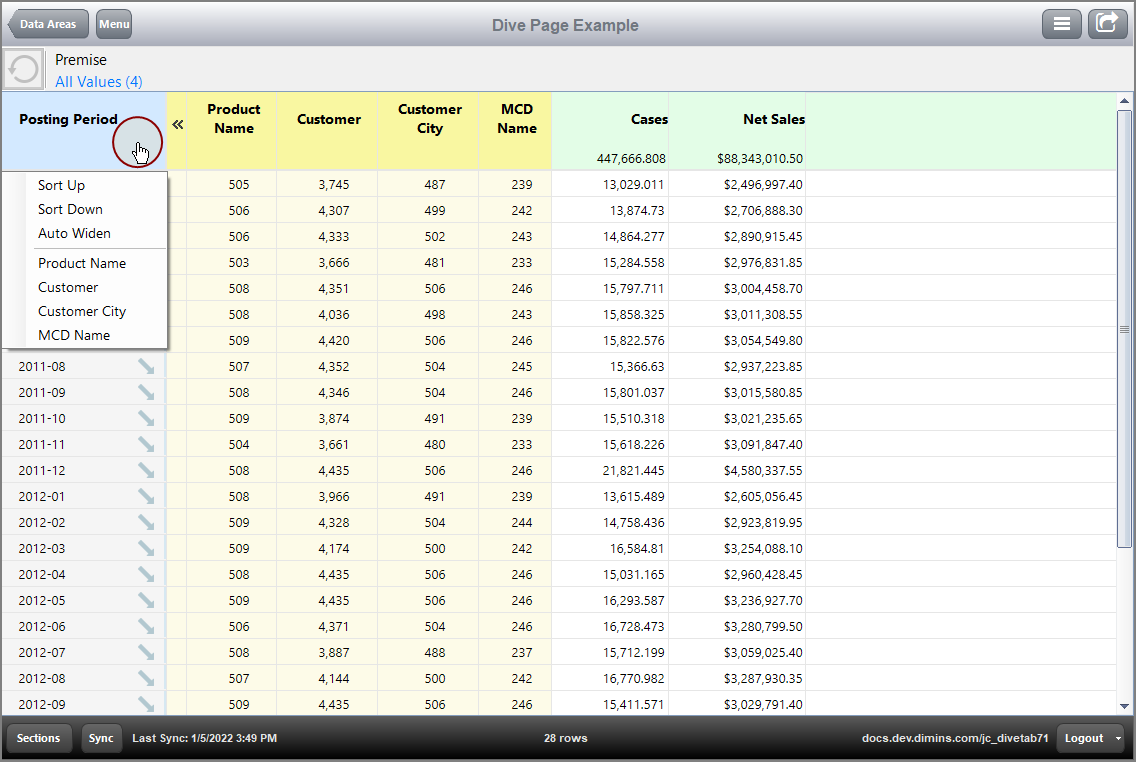
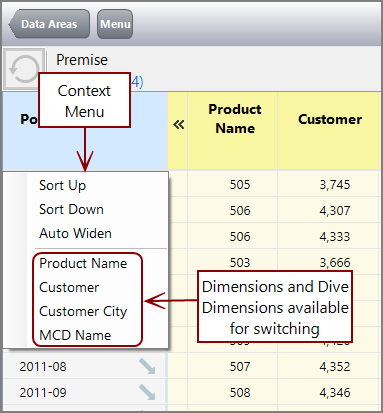
Users can use the context menu to switch the dimension that displays in the first column.
-
Click the dimension heading.
The
 context menu opens.
 -
Select a dimension name from the menu. These are typically Dive Dimensions.
In this example, the Dive Dimensions Product Name, Customer, Customer City, and MCD Name appear.
The dimension in the column is
 replaced by the selected dimension.
In this example, Product Name replaces the Posting Period dimension.
NOTE: If the selected dimension is a regular dimension as opposed to a Dive Dimension, the dimensions switch places on the display.
Notice how Posting Period becomes a Dive Dimension, while Product Name becomes the primary dimension.
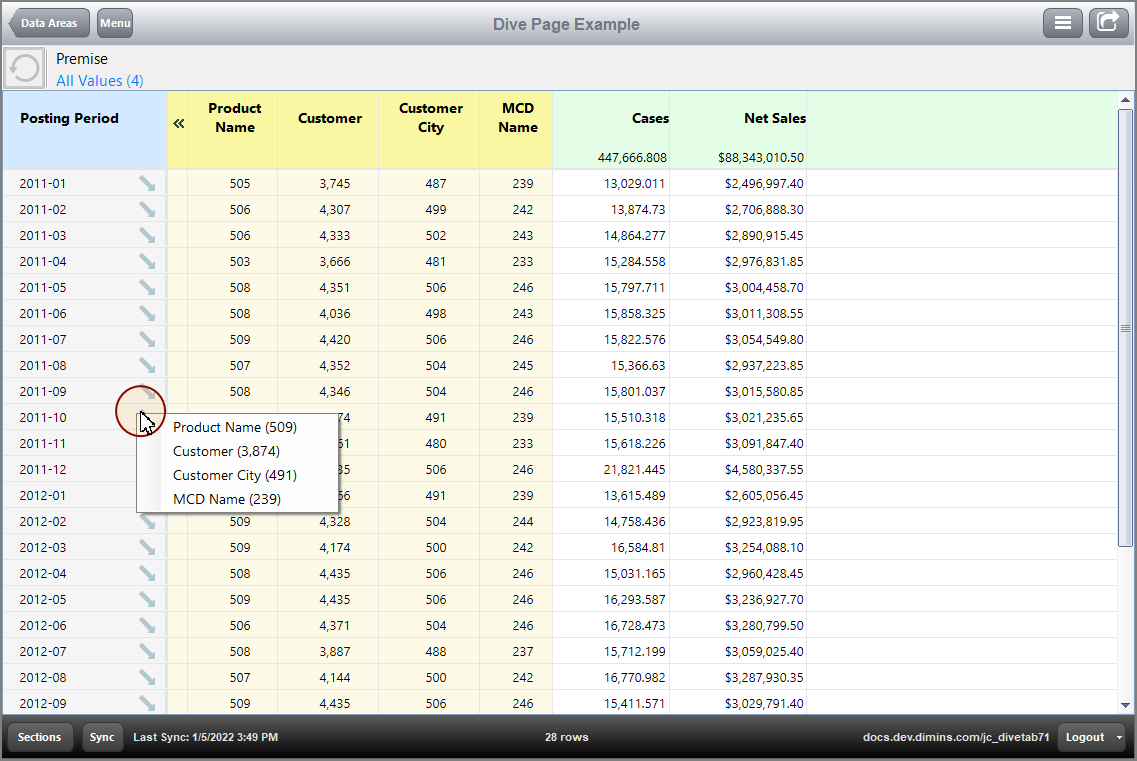
You can focus on a dimension value and examine other dimensions in relation to that value. In the primary dimension column, an arrow, ![]() indicates that diving is possible.
indicates that diving is possible.
-
Right-click a diveable dimension value.
NOTE: Left-click activates a link if one is present.
The
 context menu opens, showing diveable dimensions and their dimcounts..
NOTE: If there is more than one dimension, the dive updates all dimension values.
-
Click the dimension that you want to dive on.
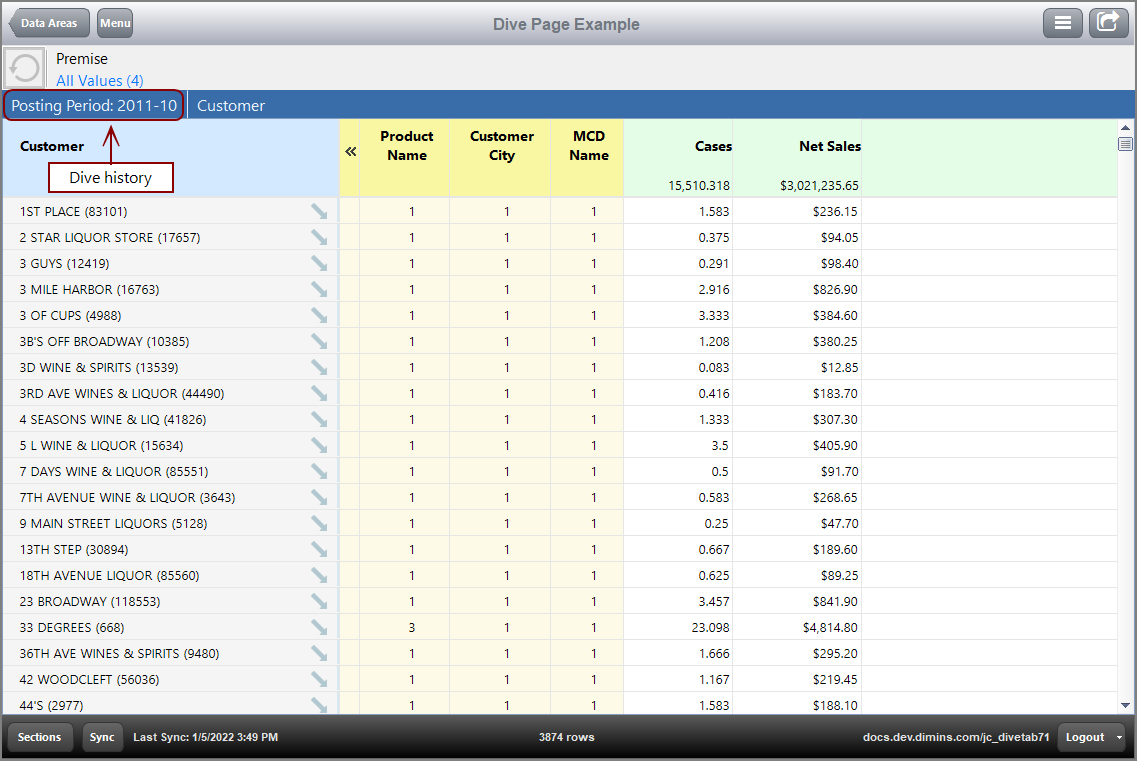
The
 page loads, showing dimension details.
Notice that the new page is filtered based on the dive. If there is more than one dive, the new page is filtered by all those dimension values.
The breadcrumb bar above the table shows the dive history. Click the different sections to return to previous pages.
-
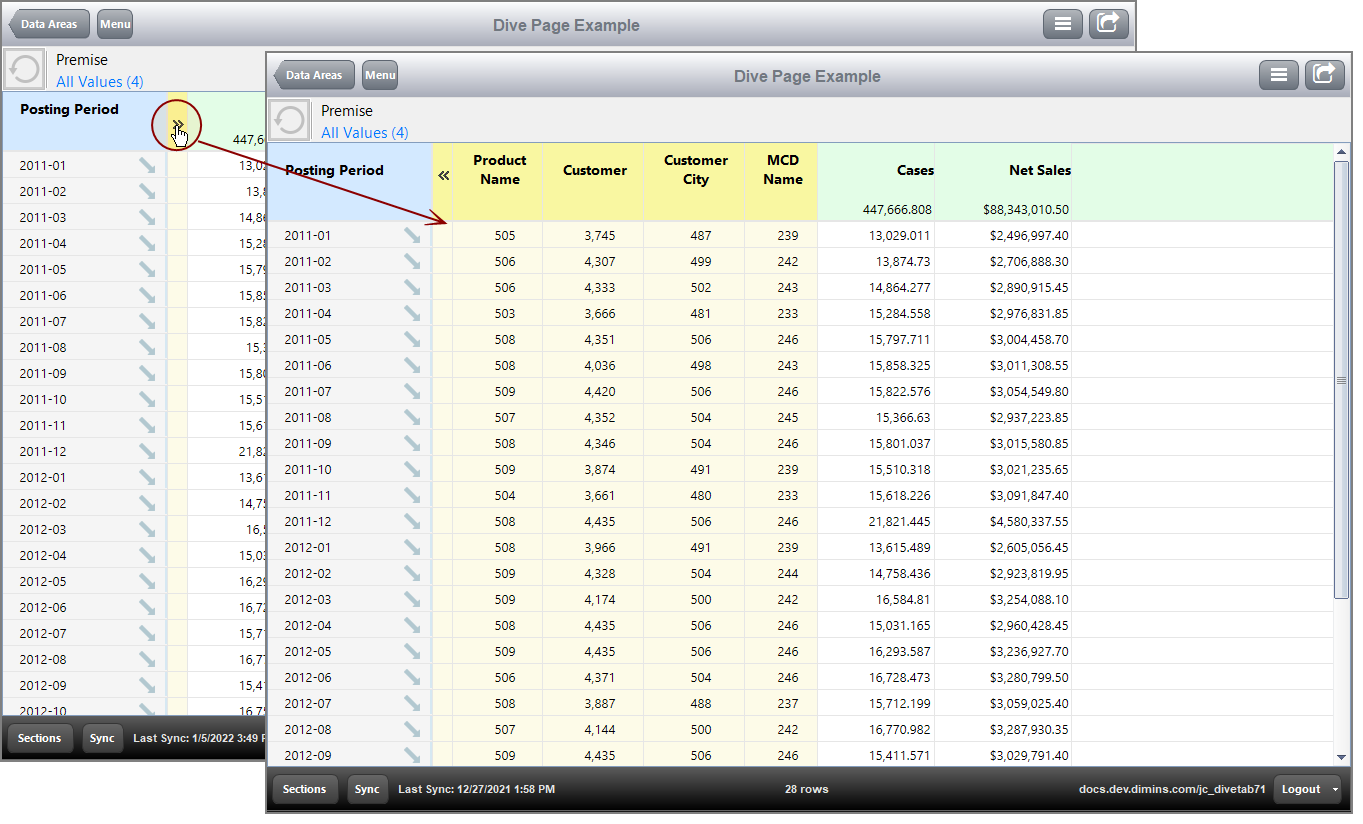
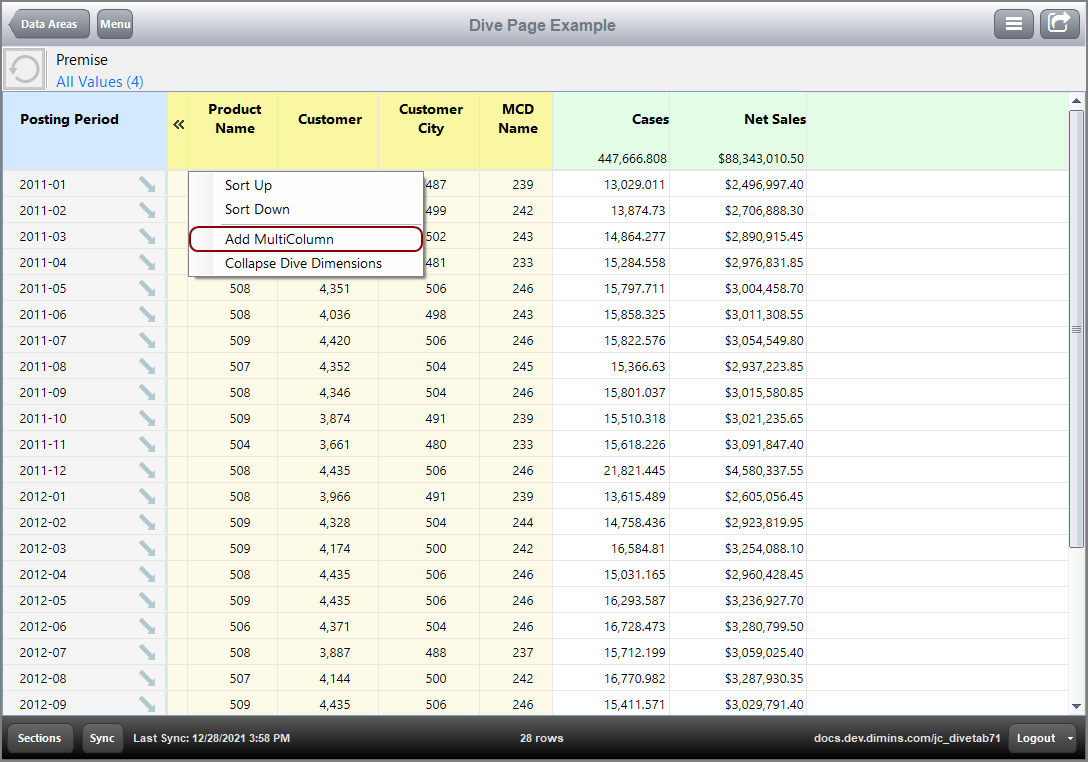
If the Dive Dimension columns are hidden, click the chevron in the yellow Dive Dimension column to display them.
In this example, the Dive Dimensions Product Name, Customer, Customer City, and MCD Name appear.
Here is how it
 appears on a PC.
 -
Click the heading for a Dive Dimension, for example Product Name.
The
 context menu opens.
 -
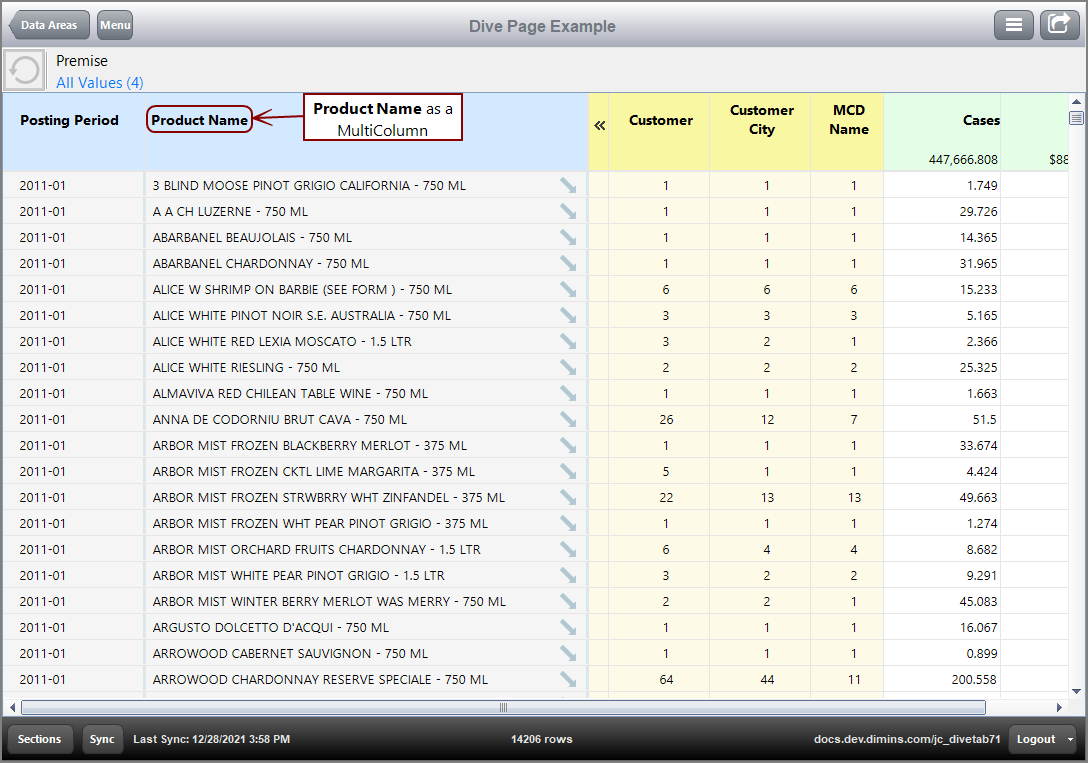
Click Add MultiColumn. The Dive Dimension Product Name now
 appears as a primary dimension with blue heading.
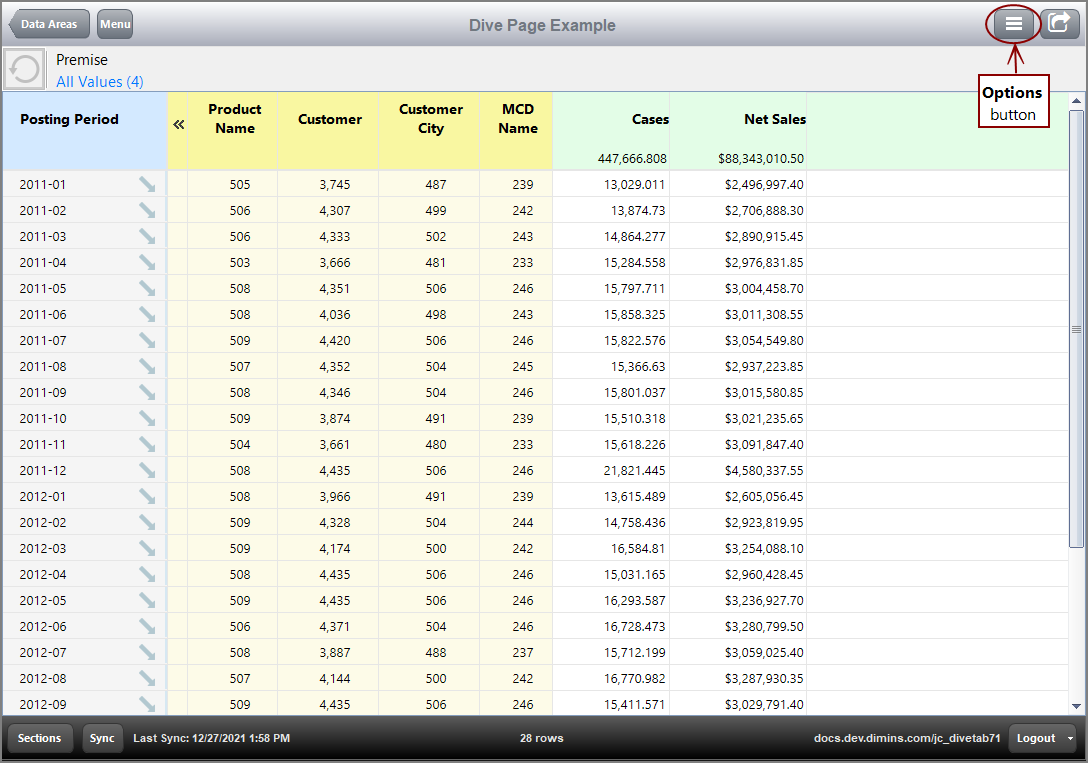
PC users can choose the dimensions that display on a dive page. On the upper right corner, a button with three horizontal lines opens the Options menu. Select the menu item Edit to open the Edit Dimensions and Summary Columns dialog box.
Here is how the ![]() Options button appears.
Options button appears.
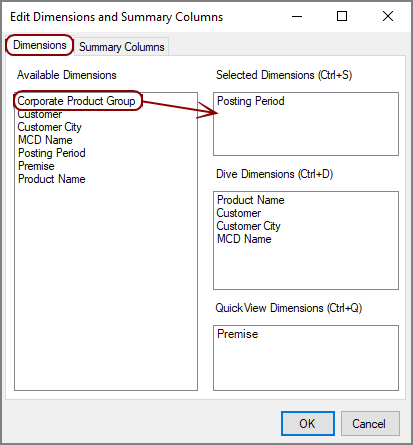
The Edit Dimensions and Summary Columns dialog box has two tabs:
The Dimensions tab has four distinct sections: Available Dimensions, Selected Dimensions, Dive Dimensions, and QuickView Dimensions.
Here is how the ![]() Dimensions tab appears. Use a drag-and-drop operation to move a dimension to a new section. For example, you can move Corporate Product Group from Available Dimensions to Selected Dimensions.
Dimensions tab appears. Use a drag-and-drop operation to move a dimension to a new section. For example, you can move Corporate Product Group from Available Dimensions to Selected Dimensions.
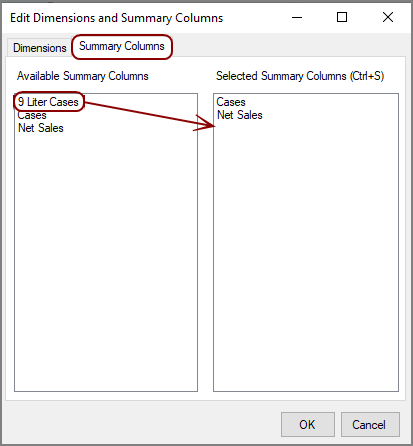
The Summary Columns tab has two sections: Available Summary Columns and Selected Summary Columns.
Here is how the ![]() Summary Columns tab appears. Use a drag-and-drop any summary column to be moved. For example, 9 Liter Cases from Available Summary Columns to Selected Summary Columns.
Summary Columns tab appears. Use a drag-and-drop any summary column to be moved. For example, 9 Liter Cases from Available Summary Columns to Selected Summary Columns.
Click OK to apply the changes.
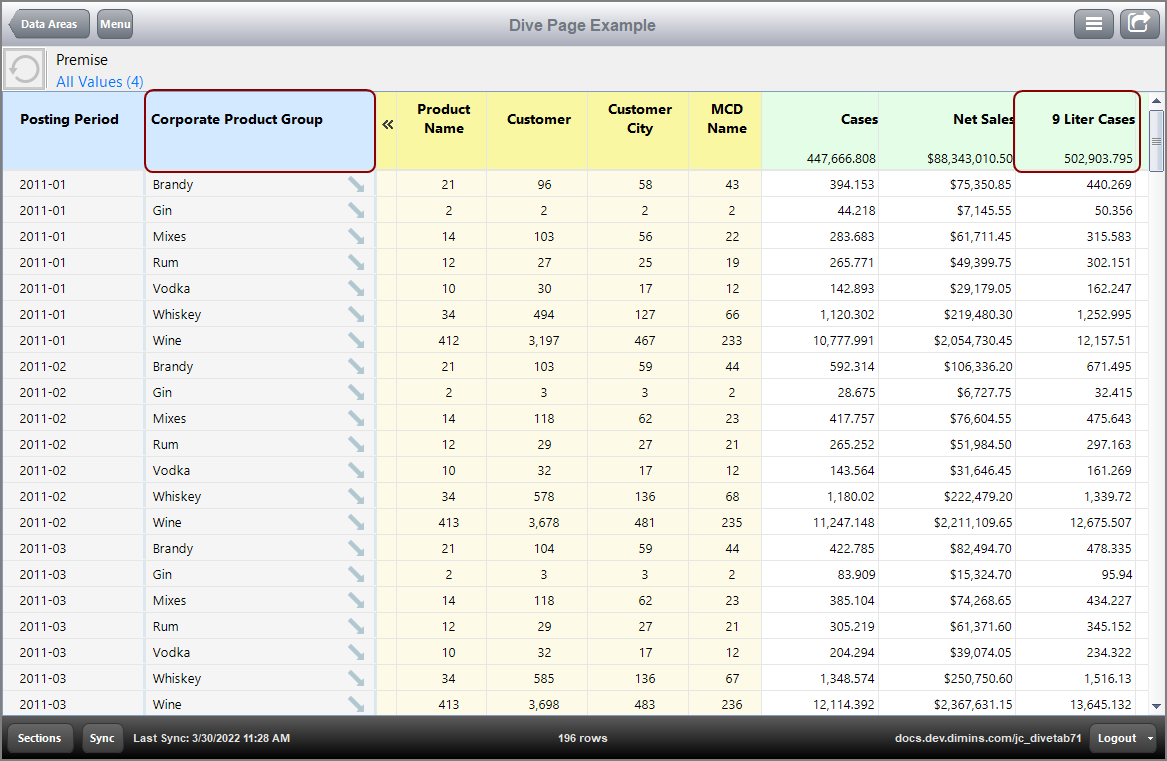
Here is the dive page with the available dimension as a primary dimension and the available summary column as a summary.
NOTES:
-
Available indicates dimensions and summary columns that the user can select and apply elsewhere within this dialog box.
-
Dimensions, Dive Dimensions, and QuickView Dimensions are automatically included as Available Dimensions.
-
You can perform a drag-and-drop operation from any of the dimensions or summary columns to another category. Keep in mind that Selected Dimensions must include at least one dimension.
-
Dimensions and summary columns appear in the order they are listed in the dialog box, from left to right.
-
If you break from the navigation chain (by returning to the top level menu, or using the Sections Button to change pages), the selections are reset, allowing you to reorganize the dive page into a new configuration.
