Prerequisite: To create a new project on a server, you must be a DiveLine administrator.
Starting a New Project
-
Open the New Project dialog box by using one of the following methods:
- Click File > New > New Project
- In the File > Open Project dialog box, at the lower left, click Create New Project
-
In the Tools > Server Settings > Projects sub-tab, at the top of the project listing, click Add Project
The
 New Project wizard displays.
-
Select the type of new project.
- Select New Project to go through the standard project setup process.
- Select Clone Project to create a project from an existing Git repository or other source outside of the DiveLine.
- Select Copy from other Project to create a copy of an existing project on the same DiveLine server. See Copying a Project.

-
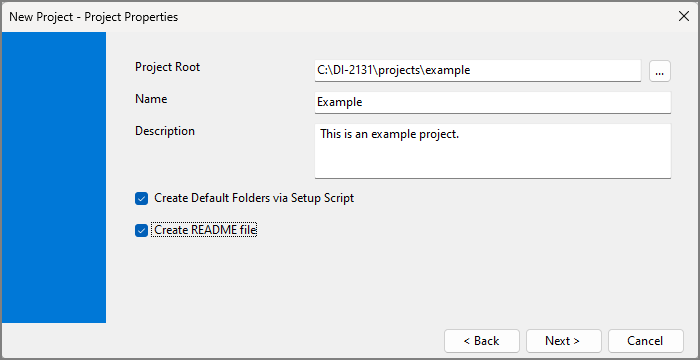
In the Project Root box, edit the path or folder name if you want to use a root other than the default. The Project Root automatically populates using the currently active DiveLine connection projects path and appends that path with the project name.
-
In the Name box, enter a name for the project.
NOTE: Project names are ultimately folder names, so any character that is forbidden in folder names is also forbidden in project names. This includes: /, \, *, ?, :, <, >, ", and |.
-
In the Description box, enter an optional description for this project.
-
Select whether or not to create default folders. For more information, see Default Folder Structure.
-
Select whether or not to create an empty README Markdown file.
-
Click Next.
The
Version Control window opens. -
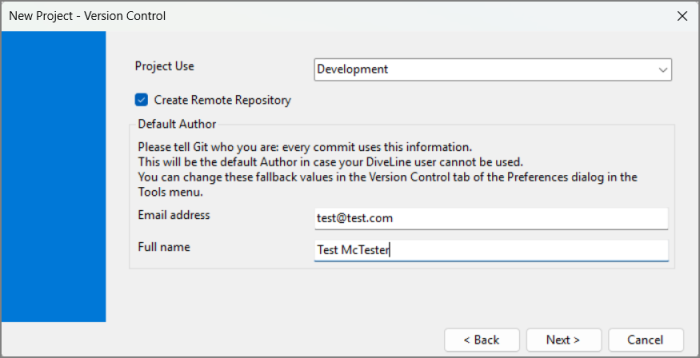
Select the Project Use type. This is optional.
-
Select whether or not to create a remote repository.
-
If this is the first project you are creating, provide an email address and name as backup values for logging Git commits. These values are used when your user profile in Server Settings does not have a full name or email address.
-
Click Next.
-
If Create Remote Repository is selected, the
Remote Repository window opens:-
Select a source. If a Repository Central Location is not configured, Remote repository URL is the only available option. For more information about configuring a Central Repository, see Getting Started with Git.
-
Provide a Repository URL. This step is only required when Remote repository URL is the source.
-
Click Next.
The
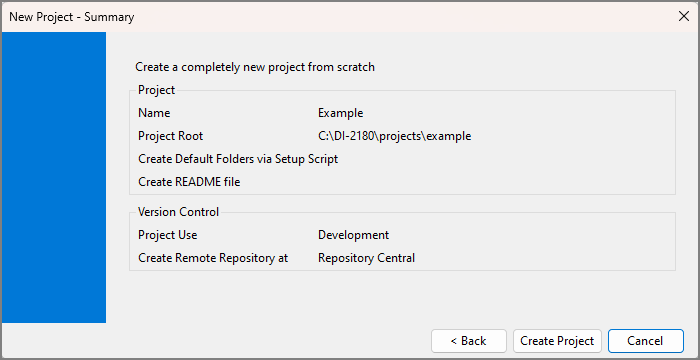
Summary window opens. Review your new project settings. -
-
Click Create Project.
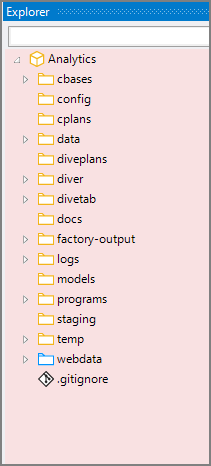
A new project is created and opens in
Workbench Explorer.

-
In the Project Root box, edit the path or folder name if you want to use a root other than the default. The Project Root automatically populates using the currently active DiveLine connection projects path and appends that path with the project name.
-
In the Name box, enter a name for the project.
NOTE: Project names are ultimately folder names, so any character that is forbidden in folder names is also forbidden in project names. This includes: /, \, *, ?, :, <, >, ", and |.
-
In the Description box, enter an optional description for this project.
-
Select whether or not to create default folders. For more information, see Default Folder Structure.
-
Select whether or not to create an empty README Markdown file.
-
Click Next.
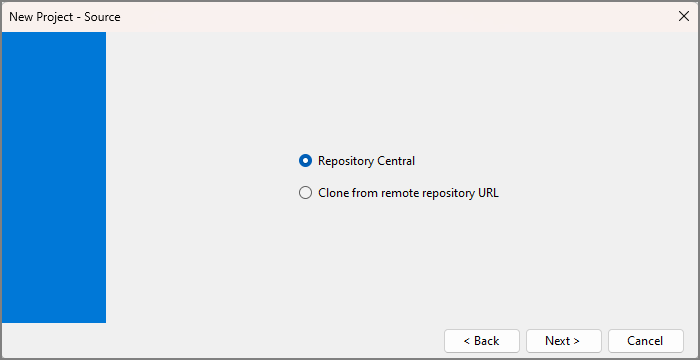
The
Source window opens. -
Select Repository Central as the source. If Repository Central is not an available option, a Repository Central Location needs to be configured. For more information about configuring a Central Repository, see Getting Started with Git.
-
Click Next.
The
Version Control window opens. -
Select the Project Use type. This is optional.
-
Select a repository from the local repository.
-
Click Next.
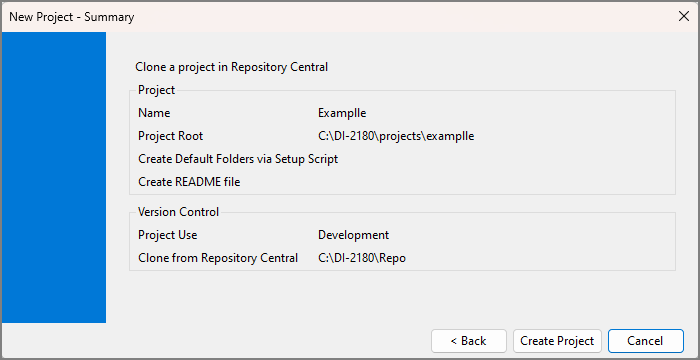
The
Summary window opens. -
Click Create Project.
A new project is created and opens in
Workbench Explorer.

-
In the Project Root box, edit the path or folder name if you want to use a root other than the default. The Project Root automatically populates using the currently active DiveLine connection projects path and appends that path with the project name.
-
In the Name box, enter a name for the project.
NOTE: Project names are ultimately folder names, so any character that is forbidden in folder names is also forbidden in project names. This includes: /, \, *, ?, :, <, >, ", and |.
-
In the Description box, enter an optional description for this project.
-
Select whether or not to create default folders. For more information, see Default Folder Structure.
-
Select whether or not to create an empty README Markdown file.
-
Click Next.
The
Source window opens.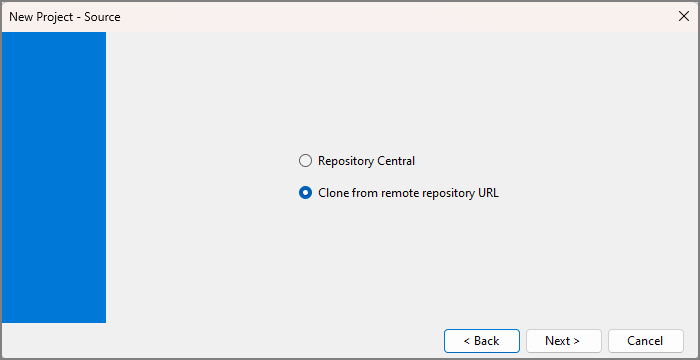
-
Select Clone from remote repository URL as the source.
-
Click Next.
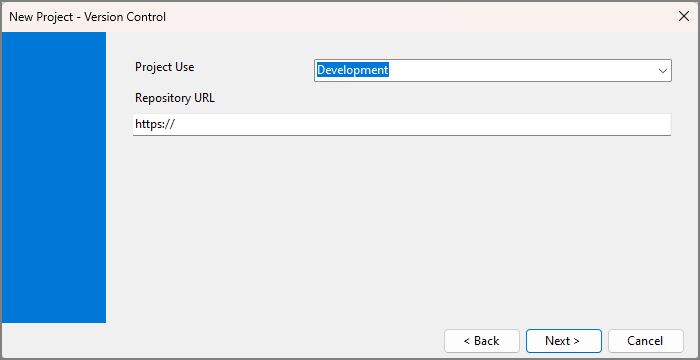
The
Version Control window opens. -
Select the Project Use type. This is optional.
-
Provide a Repository URL.
-
Click Next.
The
Summary window opens. -
Click Create Project.
A new project is created and opens in
Workbench Explorer.


-
Choose an existing project to copy in the Select other Project list.
-
Click Next.
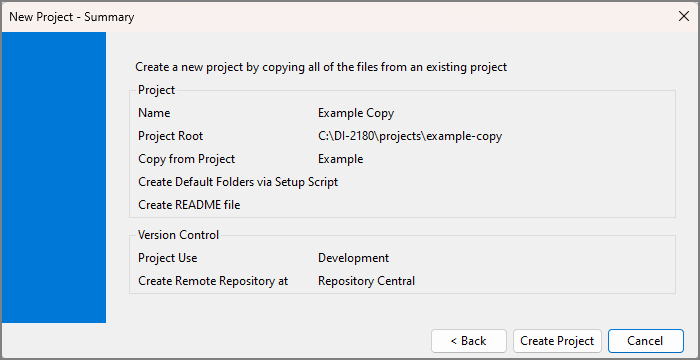
The
Project Properties window opens. -
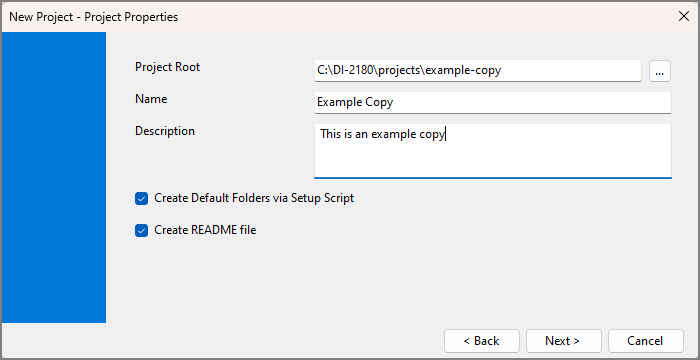
In the Project Root box, edit the path or folder name if you want to use a root other than the default. The Project Root automatically populates using the currently active DiveLine connection projects path and appends that path with the project name.
-
In the Name box, enter a name for the project.
NOTE: Project names are ultimately folder names, so any character that is forbidden in folder names is also forbidden in project names. This includes: /, \, *, ?, :, <, >, ", and |.
-
In the Description box, enter an optional description for this project.
-
Select whether or not to create default folders. For more information, see Default Folder Structure.
-
Select whether or not to create an empty README Markdown file.
-
Click Next.
The
Version Control window opens. -
Select the Project Use type. This is optional.
-
Select whether or not to create a remote repository.
-
Click Next.
-
If Create Remote Repository is selected, the
Remote Repository window opens:-
Select a source. If a Repository Central Location is not configured, Remote repository URL is the only available option. For more information about configuring a Central Repository, see Getting Started with Git.
-
Provide a Repository URL. This step is only required when Remote repository URL is the source.
-
Click Next.
The
Summary window opens. Review your settings. -
-
Click Create Project.
A new project is created and opens in
Workbench Explorer.

See also: