Complete the following steps to rename or remove columns from a DivePlan:
-
In Workbench, connect to a server, and open a project.
-
From the models directory, choose a Consolidated or Multilevel DivePlan and select Open with > DiveMaster.
-
To open the Column Alias dialog box,
 right-click a model name in the Model/DivePlan section, and select the Alias column names option.
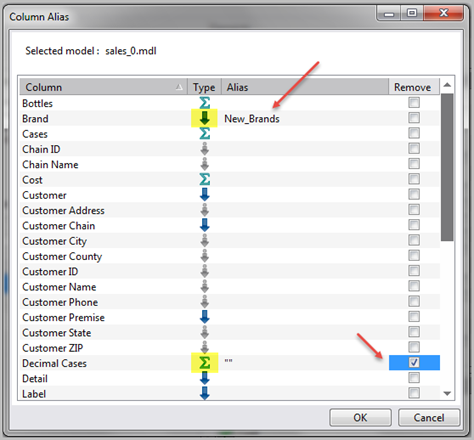
In the example graphic, Alias column names is selected for the sales_0.mdl model. -
To change the name of a dimension, in the
Column Alias dialog box, click inside the Alias cell for that dimension and enter the alias that you want to use. Further, to prevent a summary column name from loading in a Diver marker, check the Remove box for the column name.
The example graphic shows an alias, New_Brands, for the Brand dimension column. Also, the selected Remove box for Decimal Cases prevents the summary from displaying. -
Click OK to
display the All Columns panel in the start page.The numbers in the All Columns panel show the results of changes made to the DivePlan.
The example graphic shows the following changes:
- The Brand column name only appears in 2 of the 3 models added to the DivePlan because an alias changes the name of Brand in the sales_0.mdl file.
- The new alias name, New_Brands, displays for the sales_0.mdl file.
- The column name Decimal Cases is removed from 1 of the 3 models in the DivePlan.
-
Click File > Save to save the DivePlan with the changes.


See also About Modifying Column Names.