Use the Open/New Diver Application Template wizard to create an application template. You can choose which ProDiver menu items are available to users, specify which icons are available on the toolbar, and set preferences for the appearance of the dive window.
-
On the ProDiver menu bar, select
The Open/New Diver Application Template
 wizard opens.
 -
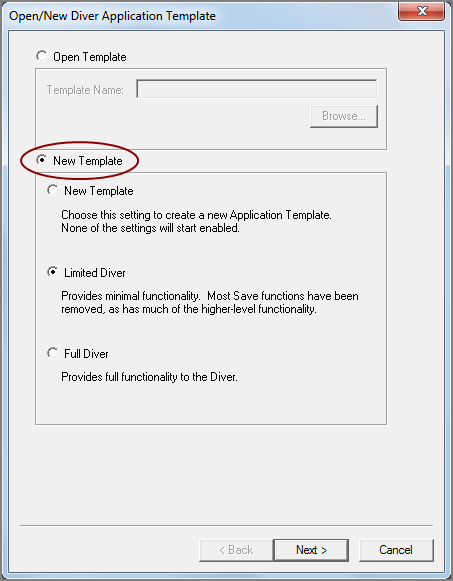
Select New Template to enable the New Template options, and then select one of the following options:
-
New Template: The template is created with no options enabled initially. You must select all options that you want the user to be able to access.
-
Limited Diver: The template is created with some options enabled initially. You can select additional options that you want the user to be able to access.
- Full Diver: The template is created with most options enabled initially. You can select additional options, or remove options to control user access.
-
-
Click Next.
The Modify Menus
page opens. -
In the Menu List, click File, and in the Menu Contents list, select the check box for each menu item that you want to be available, and clear the check box for each menu item that you want to be unavailable.
-
Select the next item in the Menu List, and select or clear the menu items as needed.
-
Repeat step 5 until you have selected menu list options for all six menus, and then click Next.
The Modify Toolbar
page opens. -
Move icons in or out of the Selected Toolbar list until it contains only the icons that you want to include on the toolbar, order them as you like, and then click Next.
The Preferences page opens.
-
Set your preferences on the General, Tabulars, Graphs, and Maps tabs, and then click Next.
NOTE: The Preferences section of the wizard is identical to the File > Preferences dialog box, except that the wizard displays an extra Files tab. The settings on this tab do not apply to ProDiver. For more information about preference options, see Setting Preferences in ProDiver.
The Save Application Template page opens.
-
Enter a Template Name with a tpl extension, browse to a location to save the template, and then click Finish.


See also: