Adding Current and Prior Period Items
To illustrate how to include the time period variables in a report, this topic describes how to create a period comparison report and how to insert the time period variables as items.
Complete the following steps:
-
Open a sales cBase or model, for example, sales_90day.mdl.
-
On the Console, double-click Company.
-
Select Edit > Select Columns, move all columns from Selected to Available, and click OK.
-
Click the Period Comparison icon.
-
Select Ship Date as the Time Dimension, and then click Next.
-
Select MTD vs Last MTD as the Period Comparison Type, and then click Next.
-
In the Select Data Columns dialog box, move Cases from Available to Selected.
-
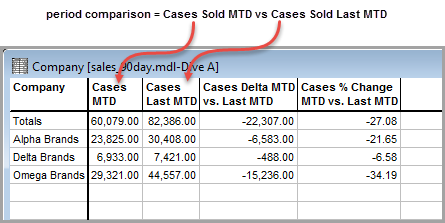
Click Finish to
 display a dive window with a time period comparison of cases sold.
 -
Click the Report icon to open the Default Report dialog box, and click OK to display the
Period Comparison report.NOTE: In this example, the Current Period ($CURRENT) value is June 1, 2010 to June 28, 2010.
-
Unlock the report and delete the Current Period item (June 1, 2010 to June 28, 2010).
-
If one exists, delete the $HEADER item (Report).
-
To add back the Current Period value, click the Add Item icon, and then click $CURRENT.
-
Click OK to
view the report. -
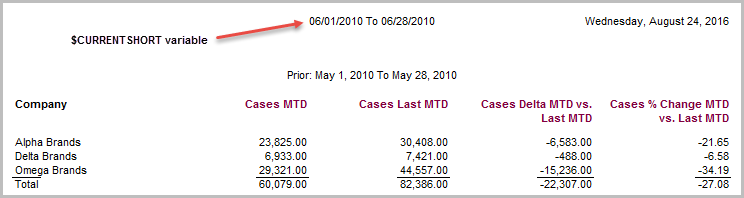
To replace the Current Period value with the shortened version, double-click the value and change $CURRENT to $CURRENTSHORT.
-
Click OK to
view the report. -
To insert the Prior Period value (May 1, 2010 To May 28, 2010), double-click the Prior: May 1, 2010 To May 28, 2010 item and replace Prior: $PRIOR with $PRIOR.
-
Click OK to
view the report. -
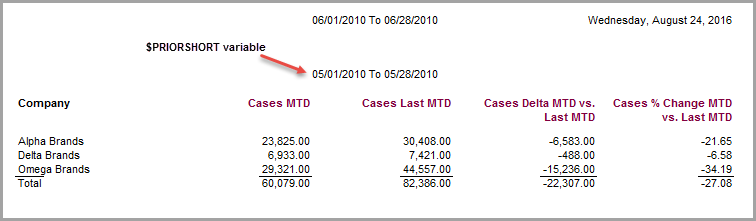
To replace the Prior Period value with the shortened version, double-click the value and change $PRIOR to $PRIORSHORT.
-
Click OK to
view the report.