QuickView settings can specify that

The Diver Platform offers the following display types or styles of QuickView:
-
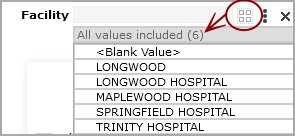
Flex—By default, a flex QuickView appears as a closed list with an expansion arrow next to it.
 Click the arrow to open the list. To select values, click the space to the left of the value name. A check mark appears to indicate that the value is selected. If enabled, you can select all values by clicking the Select All Values icon
  .
. .
.NOTE: If only one value is selected in a marker-backed QuickView that does not allow All Values, you cannot clear the selected value.
Settings can also specify that the QuickView list is expanded by default, similar to a picklist.
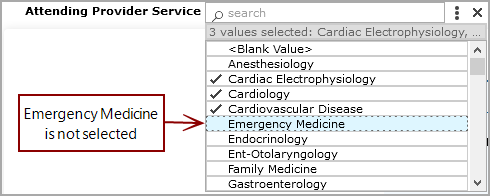
If selecting multiple values is allowed, be sure that the check mark appears for each value that you want to include. A value that displays with a
 highlight but no check mark, is not selected. You can use Ctrl+Click (Windows) or Command-Click (macOS) to highlight multiple values, and then select or clear their selection as a group.
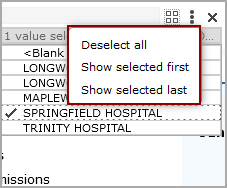
TIP: If the QuickView is collapsible, clicking the expand arrow enables a Selection Option menu, that you can use to take action on items in the QuickView list. Click Deselect all if you want to show data for all values.

-
Free Entry—A text box that contains a default value. You can enter a new value directly in the QuickView text box.

To use a Free Entry QuickView, enter criteria for the data, and then press Enter.
-
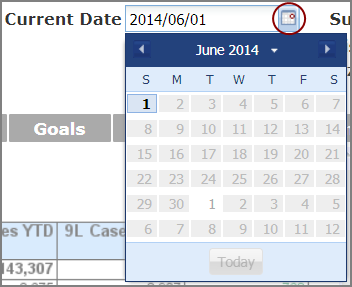
Calendar—A text box that allows you to work with date values. You can enter a date directly into the box or click the calendar icon to select a date.

Selecting an option from a QuickView can update all of the data on a page, or only certain data. For example, a QuickView might update the data in only one table.
Optionally, there might be a Go button that allows you to update multiple QuickViews at once. Change the values as you like, and then click Go to refresh the page with the new values.

NOTE: If the QuickViews are set to activate when Go is pressed, changing a QuickView disables the Print option as well as any click actions until Go is pressed. This ensures that the printed output or click action shows up-to-date data.
Time Range QuickViews
Optionally, a developer can create a ![]() Time Range QuickView that is populated with time ranges such as:
Time Range QuickView that is populated with time ranges such as:
- Today
- Week-to-Date
- Month-to-Date
- Quarter-to-Date
- Year-to-Date
- <n> Days
- <n> Months
- <n> Quarters
- <n> Years
User-Defined Time Range

DivePort administrators create QuickViews and specify their settings.
