Input table data is validated based on the constraints built into each field of the input table. Data that violates these constraints triggers a two-part error message that identifies:
- The field with the invalid entry
- The reason the entry was invalid
This constraint-based, field-by-field validation is not effective when changing a value in one field of a input table form affects the valid options in a different field. For example, selecting a hospital changes the list of valid doctors. Instead, a custom validation where the complete form is reviewed as a whole is required. A custom validation routine can be written using a Tunnel Script.
To validate a form using a Tunnel script:
- On the DivePort title bar, select ADMIN > Input Tables.
-
On the Input Tables list, click the Edit this input table chevron for the input table that you want to validate, and select Settings on the context menu.
The Input Table Settings dialog box opens.
-
At the bottom of the dialog box, next to Extra Form Validation, click Edit.
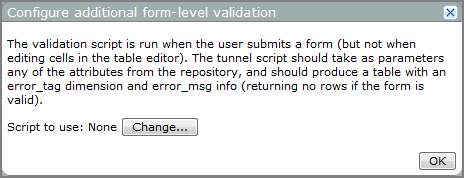
The Configure additional form-level validation
 dialog box opens.
 -
Next to Script to use, click Change.
The Select a Tunnel script dialog box opens, which you can use to browse your DiveLine files to the Tunnel script that you want to use, and then click OK.
If values for the edit are acceptable, the script returns no rows. Otherwise, the Tunnel script prepares a set of rows with two columns: error_tag and error_msg.
The output of the script (a memory model) back to DivePort contains:
dimension = {“error_tag”}
info = {“error_msg”}
In DivePort, the form displays the contents of the error messages in an orange box. The error messages remain until the user clicks OK.
See also About Whole Form Validation.
