Adding a Measures Portlet
- In DivePort, browse to the page where you want to add the portlet.
-
On the DivePort toolbar, click Edit to unlock the page and enable edit mode.
The Edit menu item is replaced with edit tools, including a page context menu chevron.
- On the toolbar, click the chevron.
- On the page context menu, click Add a Portlet.
-
On the Add Portlet page,
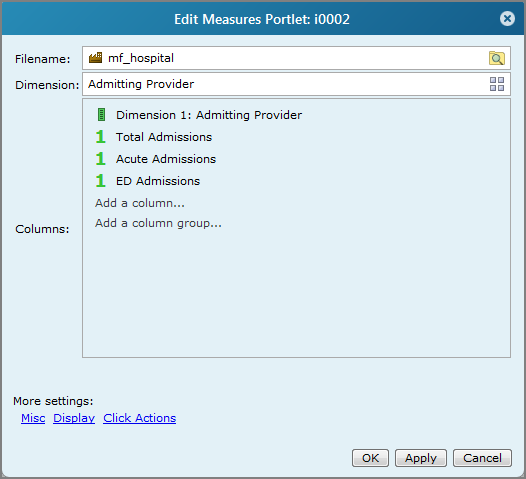
The Edit Measures Portlet dialog box opens.
This is the first page of a portlet creation wizard.
-
Browse to the data source that you want to use, and then click Next.
NOTE: Depending on the type of project that you select, you might need to select a folder and file as well as a project.
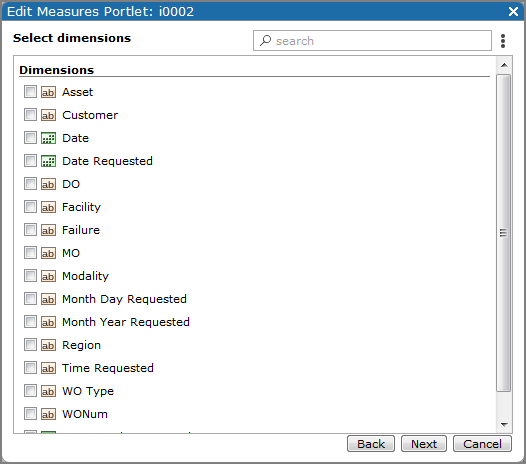
The Select dimensions
 page opens.
 -
Select the dimensions that you want to appear as primary columns on the portlet, and then click Next.
-
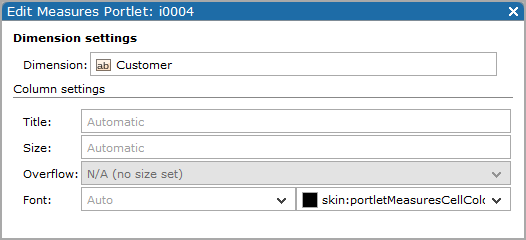
If you selected only one dimension, the wizard advances to the Dimension setting page, which you can use to customize the column heading label, width, and font. Depending on the type of dimension data, additional options might be available.
Change the options as you like, click OK, and then proceed to step 9.
- If you selected more than one dimension, the Edit Measures Portlet page shows the selected project and dimensions.
-
-
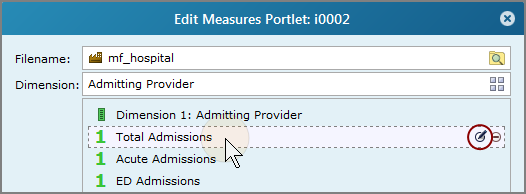
If you want to customize the appearance of a dimension column:
-
Place your pointer on the dimension
list item to expose the column menu icons. -
Click the Edit this dimension icon
 .
. The Dimension Settings
page opens, which you can use to customize the column heading label, width, and font. Depending on the type of dimension data, additional options might be available. -
Change the options as you like, and then click OK.
DivePort returns to the Edit Measures Portlet page.
-
-
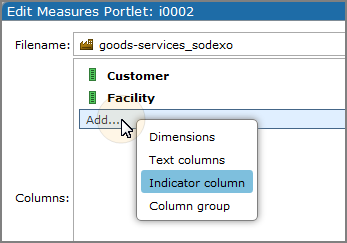
If you want to add another column, click Add at the bottom of the dimension list.
A
context menu opens, from which you can select a column type or group.NOTE: Only one indicator column or column group can be added at a time.
Alternatively, you can click the chevron on the
column menu to insert a column before the selected column. -
If you want users to be able to change the dimension that displays on the portlet, you can enable this option and specify which dimensions are available to them.
-
Under More settings, select Diving.
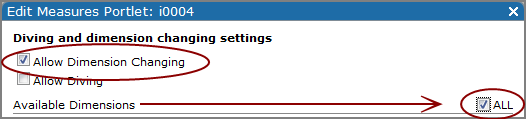
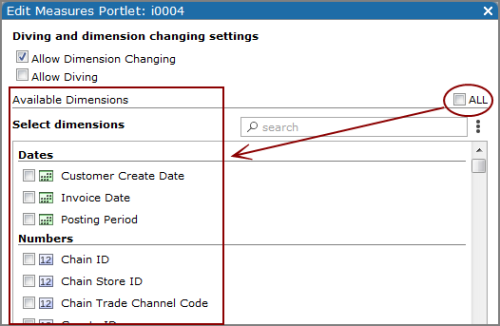
The Diving and dimension change settings
page opens. -
Select Allow Dimension Changing.
-
If you want to enable every dimension to be available for display, on the right side of Available Dimensions, select All.
-
If you want to specify which dimensions are available for display, clear the All option.
The list of dimensions is added to the
dialog box. -
For each dimension that you want to be available, select its check box.
TIP: To specify the order that the context menu lists the available dimensions, click Edit display order, and then use a drag-and-drop operation to reorder the list.
-
Click OK.
-
-
If you want users to be able to dive on dimension values, you can enable this option and specify which dimensions are available for diving. Follow the procedure described in step 10, except in step b, select Allow Diving.
Details
-
Under More settings, select Diving.
The Diving and dimension change settings page opens.
-
Select Allow Diving.

-
If you want to enable every dimension to be available for diving, on the right side of Available Dimensions, select All.
-
If you want to specify which dimensions are available for diving, clear the All option.
The list of available dimensions is added to the
dialog box.NOTE: Columns that are defined in Spectre as a double data type are not diveable, and therefore not included in the list.
-
For each dimension that you want to be available, select its check box.
TIP: To specify the order that the context menu lists the available dimensions, click Edit display order, and then use a drag-and-drop operation to reorder the list.
-
Click OK.
NOTE: If you select both Allow Dimension Changing and Allow Diving, the list of available dimension applies to both.
-
-
When you have finished customizing the dimension columns, click OK to return to the Edit Measures Portlet page.
NOTE: Even if you selected additional dimensions in the last step, only the primary dimensions appear on this page.
- If you want to add a text column, proceed to Adding a text column.
- If you want to add an indicator column, proceed to Adding an indicator column.
- If you want to stack column data, proceed to Adding a column group.
- On the toolbar, click Save to save your changes and exit edit mode.

-
Click Add > Text Columns.
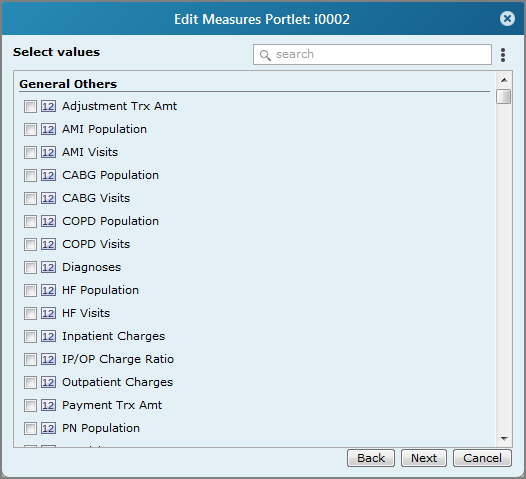
The Select values
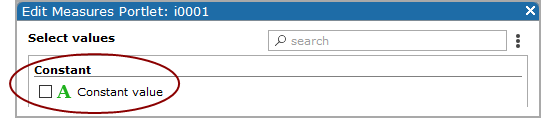
page opens. NOTE:
constant value for the column. This is especially useful for stacked columns.NOTE: Constant value columns cannot be sorted.
-
Select
The columns are added to the Edit Measures Portlet
dialog box. -
Customize the text columns as you like:
-
If you add only one text column, the edit this column dialog box opens automatically.
-
If you add more than one text column and you want to customize a column, place the pointer on the
column name, and then click the Edit this column icon  .
. -
If you are adding a Constant Value column, the edit this column dialog box opens automatically. Specify the value and format that you want to use.

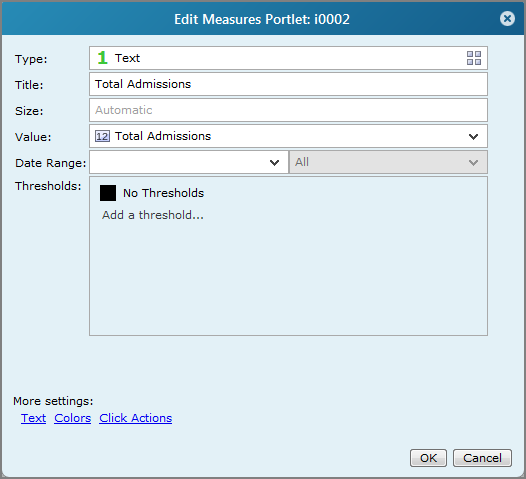
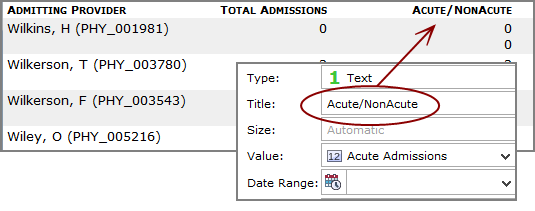
The edit this column page opens, which you can use to customize column properties.
-
-
Click OK.
- Edit other columns as you like.
- If you want to add an indicator column, proceed to Adding an indicator column.
- If you want to stack column data, proceed to Adding a column group.
- On the toolbar, click Save to save your changes and exit edit mode.
-
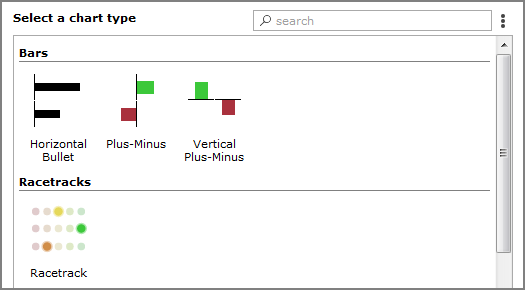
Click Add > Indicator column.
The Select a chart type
page opens. -
Select an Indicator type, and then click Next.
The Select values
page opens. NOTE:
constant value.. -
Select
The Edit this column page opens, which you can use to customize the size and label of the column, define a time period or range, specify threshold values and colors
-
Edit the properties as you like and then click OK.
- Edit other columns as you like.
- If you want to stack column data, proceed to Adding a column group.
- On the toolbar, click Save to save your changes and exit edit mode.
-
Click Add > Column group.
A stack column group is added to the list of columns.
-
Use a drag and drop operation to move data columns under the column group label, inside the dotted line.
TIP: Stacked columns are labeled with the value of the first column in the stack. Consider editing the column Title to clarify what the stack is showing or use a constant value column to label the values.
-
On the toolbar, click Save to save your changes and exit edit mode
NOTE: Stacks require more than one column. Otherwise, it is automatically deleted when you save your changes.
This procedure inserts columns before the selected existing column. To change the order of the columns, use a drag-and-drop operation.
-
On the Edit Measures Portlet page, select the column that you want to follow the new column, and click the chevron.
A list of options opens.
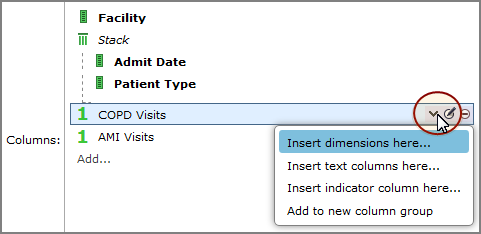
- Select the option that you want.
Notes about stacked columns:
- Selecting Add to new column group creates a stack and adds the selected column to it.
- Stacks require more than one column. If you create a stack with only one column, it is automatically deleted when you save your changes.