 Oftentimes, dashboard designers create a page that is so valuable to users that inevitably, someone wants to share the material as a PDF. When this happens, it is important that the page is what I call “print-ready”. The page needs to have been previously set up in such a way that it will look good in an 8.5” x 11” layout.
Recently, we received a comment from a blog reader asking us just how to do this. So we’ve decided to share these step-by-step instructions in this month’s Dashboard Design blog post.
The easiest way to create a print-ready page
Before you begin, make sure that your browser is not blocking popup windows.[1]
Step 1: Start with a “manual” layout
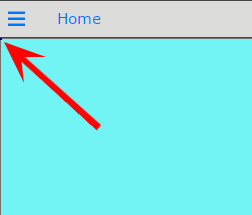
With a blank DivePort page, click on “Edit” in the upper right hand corner of the page to enter “Edit” mode. The links in the upper right hand corner of the page change to a downward pointing chevron and the word “Cancel”.
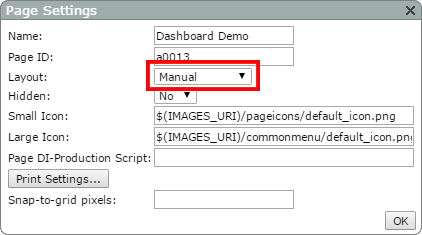
Click on the chevron and navigate the subsequent dropdown menu to select “Settings”. This activates the “Page Settings” dialogue box shown below. Select “Manual” from the dropdown list of “Layout” options. Click on the “Print Settings” button and make sure that “Print to PDF” is marked with “Yes”. Click “OK” to approve “Print Settings”, and then click “OK” again to approve “Page Settings”.
Once you have clicked “OK”, the additional links “Undo” and “Save” appear in the upper right hand corner of the page. You can click on “Save” periodically to save changes after every step, or wait until all changes to the page have been made. If you save periodically, you will have to click “Edit” after each “Save” to re-enter edit mode.
Step 2: Add a background portlet
While in edit mode, click on the downward facing chevron and scroll down to select “Add a Portlet”. This activates the “Add Portlet” popup dialogue box shown below. Highlight and select “Background Portlet”, then click “OK”.

This activates the dialogue box called “Select a Background Type” shown below.
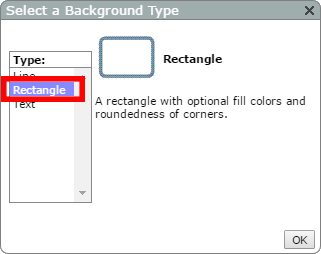
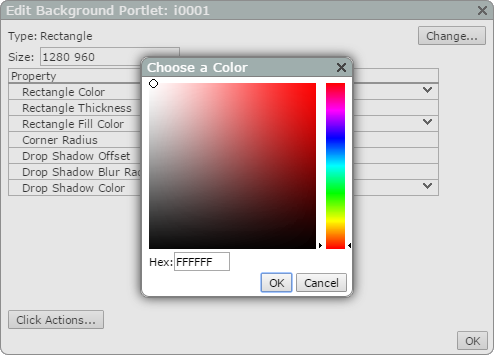
You should select the “Rectangle” background type. Once you click “OK” you will be left with the dialogue box called “Edit Background Portlet”.
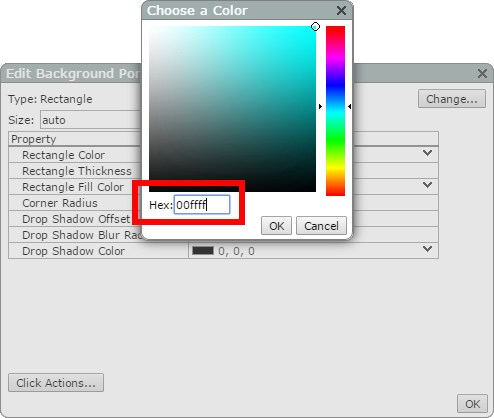
There are a number of variables one can edit here. We are primarily interested in the size and color of the rectangle. Change the rectangle fill color to #00ffff or some other color that will stand out nicely against your charts and graphs for proofing purposes.
Change the rectangle size to 1280 x 960.
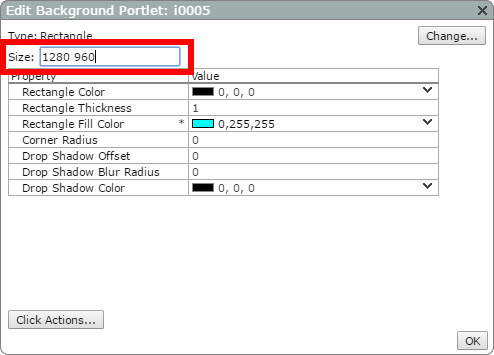
Click “OK” to approve your changes.
Step 3: Modify the instance settings
You should also make the Portlet Instance Settings 1280 x 960 pixels – if you don’t, it may be difficult to select the background once it is covered with charts and graphs. To access the Portlet Instance Settings, hover over the upper right hand corner of the “Portlet Instance” outline until a downward facing chevron appears.
The default size for the Portlet Instance is 200 x 200 pixels. So you can look for the Portlet Instance outline in this general vicinity — 200 pixels down and 200 pixels to the right of the uppermost left hand corner of the Portlet Instance.
Click the chevron and scroll down the drop down menu to “Settings”. Highlight and select “Settings” and the “Portlet Instance Settings” dialogue box appears as shown below.
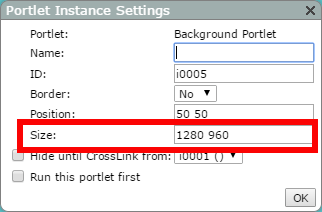
Once you have changed the size, click “OK” to approve your changes.
Now just click and drag the rectangle into the uppermost left hand corner of the layout space. You can also move the portlet by changing “Position” to “0 0” in the previous step.
Step 4: Save your work
You can now click “Save” in the upper right hand corner of DivePort to save all your edits to the page. This will cause a departure from “Edit” mode. The links in the upper right hand corner of the page change to “Print” and “Edit”.
Step 5: Test page
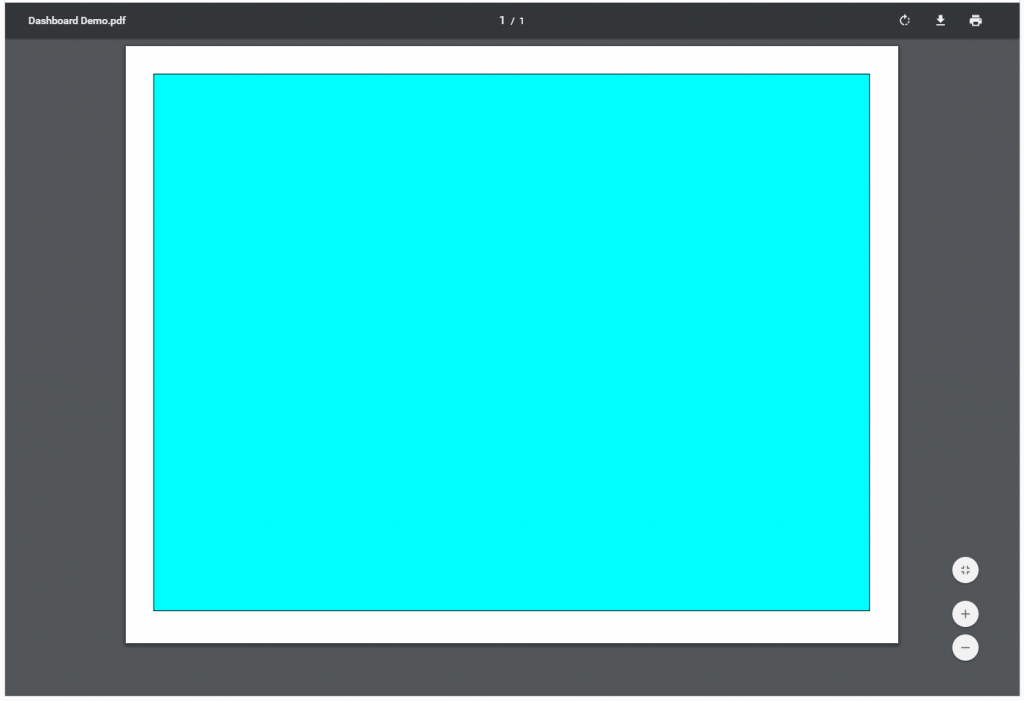
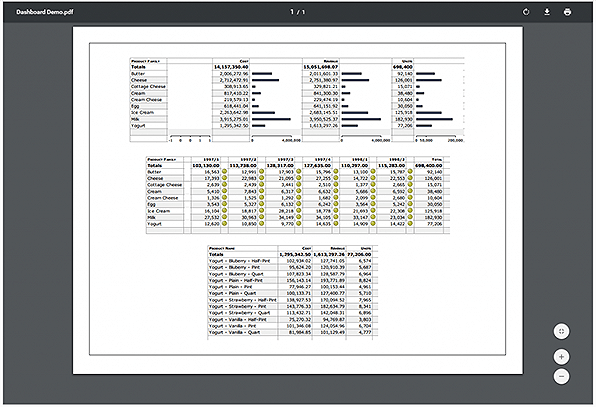
To test what you have done so far, click “Print > Print to PDF”. The PDF should appear in a pop-up window as shown below. As you can see from the PDF we just made, the blue rectangle does fit perfectly in the available space.
You can now use this space as a template for where other portlets may be placed. Once all of the portlets for your dashboard have been placed and neatly organized within this space, you can change the Background Portlet Rectangle Fill Color to white. To do so, click on the chevron in the upper right hand corner of the “Background Portlet Instance” and select “Edit”. Change the “Rectangle Fill Color” to Hex #FFFFFF.
Make sure you leave this white rectangle in the background so that PDF printing occurs correctly.
Here is my simple dashboard printed out as a PDF.
In summary, we can see that sharing PDFs of popular dashboards is quite easy. The most important thing to do is to fit all of the portlets within a 1280 x 960 pixel-sized rectangle background portlet and to leave that portlet in the background. The background portlet needs to be present to assure that printing to PDF will fit perfectly into an 8.5” x 11” layout.
Dashboard Design blog post ideas
If you have any dashboard design ideas that you would like us to explore, please send us your suggestions via email to [email protected] with the subject line: Dashboard Design Article Idea.
———
[1] NOTE: All of these steps were developed using the Simplified UI. If you are not using the Simplified UI there may be discrepancies between the article screen captures and what you see in your DivePort.

- Meet the Dimensional Insight Team: Gabrielle Amarosa - December 1, 2022
- What You Need to Know About President Biden’s Marijuana Pardon - November 2, 2022
- How to Ace this Year’s OND - September 27, 2022